
Making and maintaining a sourdough starter may seem complex, but it is actually quite simple. Wild yeast is in the air all around us, and with a few simple steps you can harness it and make a starter that will leaven homemade sourdough bread beautifully. If you do not have access to an already maintained sourdough starter, create your own!
Sourdough starters are finicky by nature and every variable (the temperature of your house, the flour, the mineral content of the water, and the temperature of the water) can affect the speed in which the yeast activates and the amount of time it takes for your sourdough starter to feed and rise in an expected manner. Above all, sourdough starters like consistency, which is a continuing theme in the directions that follow for creating and maintaining your sourdough starter.
The flour you use makes a big difference in the behaviour of your sourdough starter. Whole grain flours tend to work much faster, but can be difficult to work with. We have developed a method for creating a sourdough starter with our Flourist Sifted Red Spring Wheat Flour, which we have found behaves the closest to standard commercial bread flour {but with without the nasty additives}, and creates a sourdough starter that is easy to use and maintain. You can also use the Flourist Sifted Red Fife Flour for great results too. A kitchen scale is recommended for anyone looking to experiment with sourdough baking.
Making a Sourdough Starter
Combine equal parts Flourist Sifted Red Spring Wheat Flour and room temperature water (we prefer 100g of each). Cover and let it sit somewhere the temperature is consistent for 24-48 hours. Check after 24 hours to see if any bubbles have formed in the mix. The presence of bubbles is an indication that the yeast from the air is feeding on the sugars in the flour and is releasing carbon dioxide. It is important to note that you should ideally feed your starter at the same time each day, so choose a time either in the morning or evening depending on what works with your schedule.
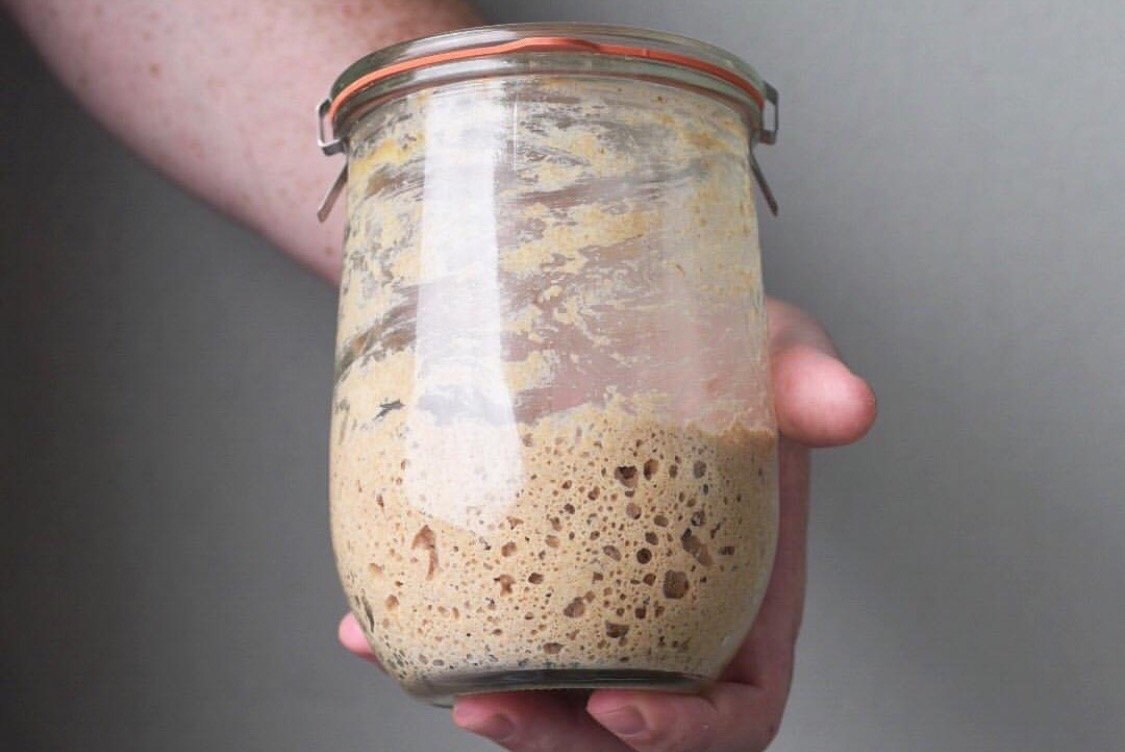
Once you have reached the stage of seeing visual bubbles, you need to begin feeding your starter. It will take about five or six "feedings" before it begins to behave consistently and is ready for you to begin baking with. Ideally, feed your new starter for a week before using it to ensure that it has gotten used to its routine of feedings.
Feeding a Sourdough Starter
In order to maintain a standard amount of sourdough starter, weigh out 100g of starter for the feeding and discard the rest. Feed with 100g Flourist Sifted Red Spring Wheat Flour and 100g water each time. Discarding the extra may seem like a lot of waste, but once your starter is ready to be used the discard can be used in so many different recipes such as waffles, crackers, and muffins. Perform the first feeding and let sit for 24 hours.
Repeat this step consistently, feeding your starter at the same time each day, for at least 5 days. Your starter is ideal to bake with when it has doubled in size after 24 hours, is bubbly, and has a nice sour smell. It is ideal to maintain your starter in this manner moving forward.
Once you are ready to use your starter you may find that you need to increase the amount that you have for your recipe. A good rule of thumb is to maintain a ratio of 1:1:1 (equal parts sourdough starter, water, and flour). The amount can be increased or decreased as needed. It is nice to keep a small amount when you are not intending to use it for baking as then there is less discard waste to manage.
Maintaining your starter at room temperature ideally requires a daily feeding. If you find this too cumbersome, you can keep your starter in the fridge and feed it once a week. If you keep it in the fridge it is a good idea to let it sit out after feeding for about 8-12 hours, so that the yeast has time to reactivate itself before putting it back in the fridge. Putting your starter in the fridge "hibernates" the yeast, so we suggest you remove it from the fridge and feed it for at least one day, ideally two, before you use it again to make bread. This gives the yeast time to "wake up" and become active again.
Ready to bake? Get our Basic Sourdough Boule recipe here.
Photo Credit: Flourist customer Laura Brehaut


Comments